Vegetables
Starting Tomatoes from Seed in the Inland Empire: A Complete Guide
Starting tomatoes from seed gives you access to hundreds of varieties unavailable at nurseries, saves money, and gives you an incredible head start on the season. Here's exactly how to do it in zone 9b.
If you've only ever bought tomato starts from the nursery, you're missing out on one of the most rewarding aspects of vegetable gardening. Starting from seed opens an entirely different world — hundreds of varieties you'll never see at Home Depot, the satisfaction of growing from tiny seed to abundant harvest, and significant cost savings when you're growing many plants.
In Warm Springs, our timing window for starting tomatoes indoors is late January through mid-February. Start too early and your seedlings get leggy and root-bound before safe transplant time. Start too late and you miss weeks of potential production in our long growing season.
When to Start Tomatoes in Zone 9b
The goal is to have stocky, healthy 6–8 week-old transplants ready when outdoor conditions are right. In Warm Springs:
- Outdoor transplant date: Mid to late March (after last frost risk passes and nights reliably stay above 50°F)
- Count back 6–8 weeks: Start seeds late January to mid-February
- Sweet spot: February 1–15 for most years
This timing gives transplants that are large enough to establish quickly but small enough that they haven't become root-bound or stressed from being in small containers too long.
Seed Starting Mix: Why It Matters
Do not use regular potting mix for seed starting. It's too dense, doesn't drain well enough, and can harbor pathogens that cause damping off (the fungal disease that kills seedlings at the soil line).
My Seed Starting Mix
- 50% coco coir (base — moisture retention, pH neutral, sustainable)
- 40% vermiculite (drainage, aeration, prevents damping off)
- 10% worm castings (gentle nutrition and beneficial microbes)
This mix drains freely, holds just enough moisture, and creates the ideal environment for germination and young root development. It's notably better than commercial seed-starting mixes I've tested.
Equipment You Need
Grow Lights — Non-Negotiable
This is the biggest mistake beginner seed starters make: trying to grow tomato seedlings on a windowsill. In late January and February, even a south-facing window in Southern California doesn't provide enough light intensity or duration for healthy tomato seedlings. The result is leggy, weak seedlings that struggle to establish outdoors.
Invest in LED grow lights. LED grow lights are energy efficient, low heat, and provide the full spectrum seedlings need. Run them 14–16 hours per day, keeping the light 2–4 inches above seedling tops (raise as plants grow).
Heat Mat
Tomato seeds germinate best at soil temperatures of 70–85°F. In February, indoor temperatures may not reach this, especially at night. A seedling heat mat provides consistent bottom heat that dramatically improves germination rate and speed.
Use the heat mat for germination only — once seedlings emerge, move them off the mat (excess heat can stress young plants).
Small Fan for Air Circulation
A small fan running on low setting brushes seedlings gently for a few hours each day. This does two important things:
- Prevents fungal diseases that thrive in stagnant air
- Stimulates stem strengthening (in nature, wind movement causes stems to thicken — a process called thigmomorphogenesis)
Plant Labels + UV Markers
In a flat of 50 tomato seedlings, it's impossible to tell varieties apart by appearance. Label every cell at planting time with plant labels and UV-resistant markers. Regular markers fade in weeks under grow lights — UV-resistant markers stay readable all season.
Step-by-Step: Starting Tomato Seeds
Step 1: Prepare Your Containers
Fill 6-cell seedling trays or 2-inch cells with moist seed-starting mix. Press lightly to firm without compacting. The mix should be damp — not wet.
Step 2: Sow Seeds
Sow 2 seeds per cell, 1/4 inch deep. Cover lightly with a thin pinch of vermiculite. Label immediately.
Covering with vermiculite (rather than potting mix) keeps the surface from crusting and provides uniform moisture around seeds as they germinate.
Step 3: Provide Heat for Germination
Place trays on heat mat. Cover with a clear dome or plastic wrap to retain moisture. No light needed during germination — seeds don't need it and the dome blocks it anyway.
Check daily. Tomato seeds typically germinate in 5–10 days at proper temperature.
Step 4: Remove Dome, Add Light
The moment you see the first sprouts, remove the dome and immediately move trays under grow lights. This is critical — seedlings that spend even two days without adequate light become permanently leggy.
Set grow lights to 14–16 hours per day. I run mine from 6am to 10pm on a timer.
Step 5: Thin to One Per Cell
Once seedlings have their first true leaves (the second set — distinctly tomato-shaped), thin to one plant per cell. Use scissors to cut the weaker seedling at soil level rather than pulling (pulling can disturb the remaining seedling's roots).
Step 6: Water Carefully
The most common seedling killer is overwatering. Water when the surface of the mix just begins to dry out. Water from below by placing trays in a shallow dish of water — the mix wicks up what it needs without disturbing seedlings or creating overly wet surface conditions that encourage damping off.
Step 7: Begin Light Fertilizing
Once plants have their first true leaves, begin feeding weekly with a diluted organic fertilizer (use at 1/4 strength for seedlings). The worm castings in your seed starting mix provide some nutrition, but seedlings in small cells benefit from supplemental feeding.
Step 8: Pot Up as Needed
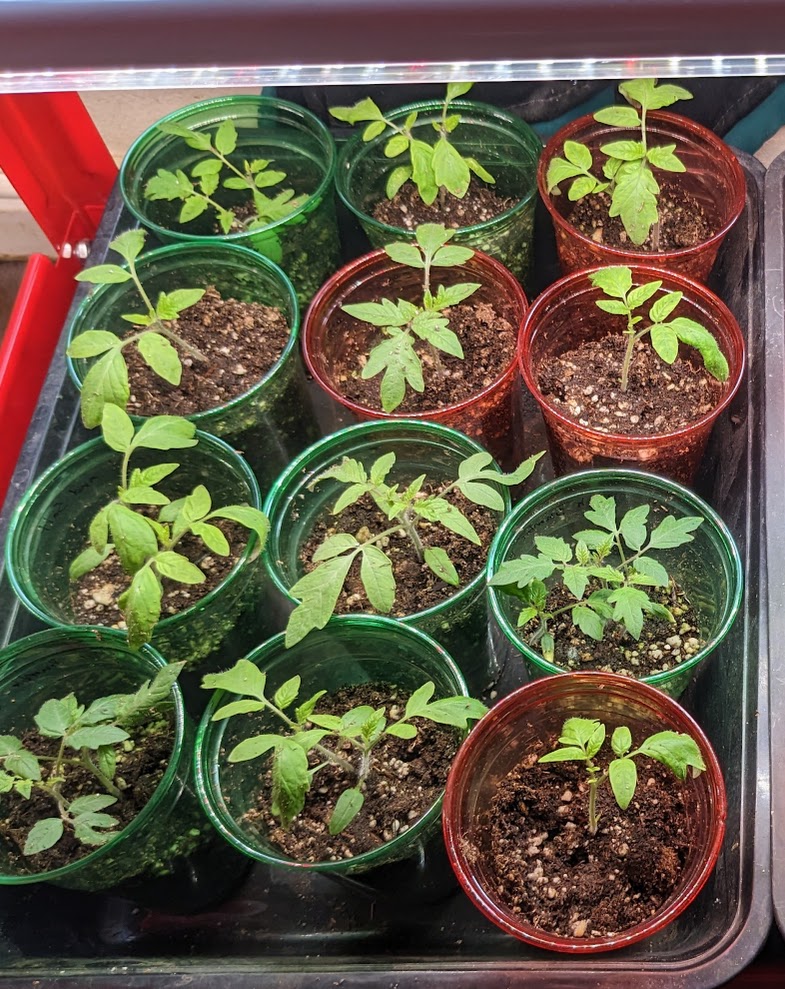
When roots begin circling the bottom of cells or poking out drainage holes, it's time to pot up to a 4-inch container. Tomatoes can be buried deeper than they were growing — bury the stem up to the first set of leaves. Roots will form all along the buried stem.
Fill 4-inch pots with a richer mix: 60% compost, 30% coco coir, 10% worm castings.
Hardening Off: The Critical Step
Transplanting seedlings grown under artificial light directly into full Southern California sun will shock them badly — sunburn, wilting, setback, sometimes death. Hardening off is the gradual acclimatization process that bridges indoor growing conditions and outdoor reality.
Hardening Off Timeline (Start 10–14 days before transplant):
- Days 1–3: Place seedlings outdoors in morning only (1–2 hours), protected from direct sun. Bring in before temperatures swing
- Days 4–6: 3–4 hours outdoors, some direct morning sun
- Days 7–9: Half day outdoors including direct sun
- Days 10–12: Full day outdoors, bring in at night if temps drop below 50°F
- Days 13+: Overnight outdoors if frost risk has passed
Properly hardened transplants go in the ground without missing a beat. Improperly hardened transplants may take weeks to recover.
Transplanting Outdoors
Once hardened and soil temperatures reach 60°F (typically mid to late March in Warm Springs):
- Prepare holes deeper than root ball — tomatoes can be buried 2/3 of the stem
- Add a handful of compost and worm castings to each hole
- Water the transplant thoroughly before removing from pot
- Set in hole, fill with prepared soil, firm gently
- Water deeply
- Mulch with 2–3 inches of straw mulch keeping stem clear
- Install support stakes or cages
Variety Recommendations for Zone 9b
Some excellent performers in Inland Empire heat:
Slicers:
- Brandywine — Best flavor, slightly lower yields; worth it
- Celebrity — Reliable producer, disease resistant
- Early Girl — Fast producer, long season
- Jet Star — Great flavor, heat tolerant
Cherry & Grape:
- Sun Gold — Extraordinary sweetness; once you grow it you never stop
- Sweet Million — Huge clusters, reliable producer
- Black Cherry — Complex flavor, beautiful color
Paste/Sauce:
- San Marzano — Classic Italian sauce tomato
- Amish Paste — Large, meaty, incredibly productive
- Opalka — Thin skin, incredible sauce flavor
Heat Note: In Warm Springs heat waves (110°F+), most tomatoes drop blossoms without setting fruit. Heat-set varieties like Heatmaster and Solar Fire continue producing through high heat. I recommend planting at least some of both types.
Want week-by-week guidance on when to start seeds, transplant, and fertilize tomatoes in your specific location? Sow What? Now! provides personalized planting recommendations based on your ZIP code and the current week. No more generic timing advice — get guidance calibrated to exactly where and when you're growing.
Disclosure: This post contains affiliate links. If you purchase through these links, I may earn a small commission at no additional cost to you. I only recommend products I personally use and trust in my own Inland Empire garden.
Filed under:
🌱
Know Exactly What to Plant This Week
Get personalised, AI-powered planting recommendations for your exact ZIP code and climate zone — every week. Sow What? Now! is free and currently in beta.
Try Sow What? Now! → Free